
The concept of “curb appeal” is often misconstrued as a purely aesthetic vanity project, a way to simply make a house look pretty from the street. However, in the realm of real estate and long-term property management, the exterior of your home is a powerful financial tool. It is the definitive first impression, the psychological anchor that sets the tone for the perceived value of the entire property before a guest or prospective buyer even steps through the front door. A meticulously maintained and thoughtfully upgraded exterior communicates a narrative of pride, structural integrity, and overall quality.
Unfortunately, many homeowners allocate their entire renovation budgets exclusively to interior projects like kitchen remodels and bathroom expansions. While these interior upgrades are undoubtedly valuable, neglecting the exterior means missing out on some of the highest and most reliable returns on investment available in the residential market. An outdated, deteriorating, or uninspired façade can drastically drag down the appraisal value of a home, regardless of how luxurious the interior might be. Conversely, strategic exterior renovations offer a remarkable dual benefit: they dramatically improve your daily living experience while yielding substantial financial dividends upon resale.
This comprehensive guide explores the most impactful exterior upgrades you can undertake. By strategically revitalizing entryways, fortifying your roof and exterior walls with modern materials, optimizing your property’s approach, and designing resort-style outdoor living spaces, you can transform your home into a neighborhood standout. The key is to balance necessary structural fortifications with visually stunning aesthetic upgrades, ensuring that every dollar spent works to protect your investment while elevating your everyday lifestyle.

Revamping the Entryway for Maximum Impact
Opt for Steel or Fiberglass Materials to Maximize Insulation
The primary entryway of your home is an architectural focal point and a critical barrier against the elements. For decades, solid wood was the gold standard for entryways, prized for its classic weight and rich grain. However, the modern homeowner is increasingly transitioning away from traditional wood materials due to their inherent vulnerabilities. Wood is highly susceptible to warping, swelling, and cracking when exposed to fluctuating humidity and extreme temperatures. This constant expansion and contraction not only degrades the aesthetic appeal over time but also compromises the weather seal, leading to significant energy loss and uncomfortable drafts in your foyer.
To combat these issues, transitioning to modern fiberglass or steel alternatives is one of the smartest upgrades you can make. Fiberglass mimics the exact texture and grain of natural wood without any of the associated maintenance. It will not rot, rust, or dent, and its internal polyurethane foam core offers exceptional thermal resistance, significantly lowering your heating and cooling bills. Steel, on the other hand, provides the ultimate in home security and durability, offering a sleek, modern finish that is highly resistant to forced entry. Industry data consistently shows that upgrading to a high-efficiency entry unit offers an incredible return on investment, often recouping nearly the entire cost at resale. To ensure the new frame is perfectly plumb, properly shimmed, and flawlessly weatherstripped, it is highly recommended to partner with a specialized front door contractor who understands the intricate thermodynamics and structural requirements of modern entryway systems.
-
Analyze the R-Value: When selecting your new entryway, prioritize units with high R-values, which measure the material’s resistance to heat flow. The higher the R-value, the better the insulation.
-
Invest in High-Quality Weatherstripping: Even the most insulated slab is useless if the perimeter allows air to escape. Ensure your installer uses premium magnetic weatherstripping or compression seals for an airtight fit.
-
Consider Glass Inserts carefully: If you opt for decorative glass panels, ensure they are double or triple-paned with low-emissivity (Low-E) coatings to prevent thermal transfer while still allowing natural light to flood your interior.
Use Bold, Contrasting Colors to Create a Focal Point
Once the structural and insulating properties of the entryway are secured, the focus must shift to visual impact. Your entry should act as a welcoming beacon, drawing the eye naturally toward the center of the home. The most cost-effective and striking way to achieve this is through the strategic use of bold, contrasting colors. A fresh coat of premium, weather-resistant paint can completely alter the personality of your property’s façade.
If your house features a relatively neutral exterior palette—such as white, light gray, beige, or pale brick—painting the entry a striking, unexpected color creates a sophisticated focal point. Matte black offers a modern, grounded elegance, while a rich navy blue provides a classic, nautical charm. For a more daring and energetic vibe, a vibrant, high-gloss red or deep emerald green can make a profound statement. The key is to choose a color that complements your home’s undertones while still standing out entirely from the surrounding siding and trim.
-
Update the Surrounding Hardware: A newly painted slab will only look as good as the hardware attached to it. Replace tarnished, outdated brass knobs with modern, matte black, brushed nickel, or oil-rubbed bronze handle sets.
-
Integrate Smart Technology: Upgrade your security and convenience simultaneously by installing a low-profile smart lock. Modern smart locks blend seamlessly with contemporary hardware finishes and allow for keyless entry, guest access codes, and remote monitoring.
-
Maximize House Numbers and Lighting: Install oversized, modern, floating house numbers that match your new hardware finish. Frame the entryway with upgraded sconces that cast a warm, inviting glow, ensuring the striking new color is visible and welcoming even after the sun goes down.
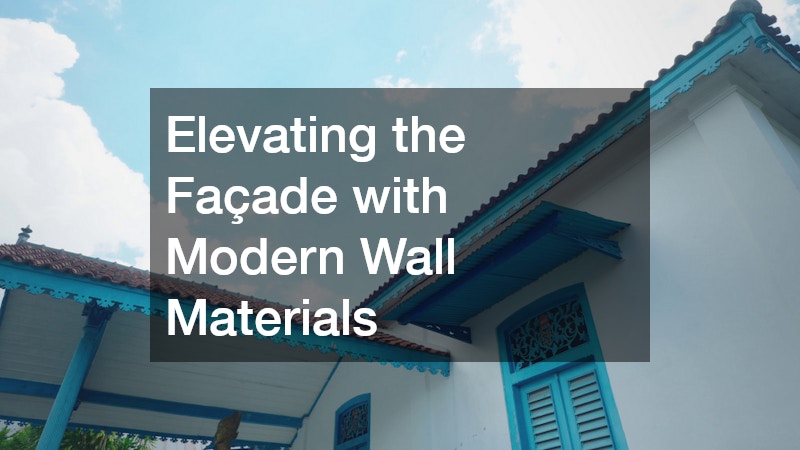
Elevating the Façade with Modern Wall Materials
Integrate Manufactured Stone Veneer to Break Up Monotony
A visually flat or monochromatic exterior can make even a large, well-built home appear uninspired and one-dimensional. To inject immediate architectural depth and rugged elegance into your façade, integrating manufactured stone veneer is an unparalleled design strategy. Unlike natural quarried stone, which is incredibly heavy, expensive, and requires extensive structural reinforcement to support its weight, manufactured stone veneer is cast from lightweight concrete mixtures poured into molds crafted from real stone. This process captures every fissure, texture, and nuance of natural rock at a fraction of the weight and cost.
Applying stone veneer to the bottom third of your home’s exterior—a technique known as a wainscot—grounds the structure visually, making it appear more substantial and deeply rooted in its landscape. It is also an excellent material for wrapping unsightly exposed foundation concrete, highlighting architectural pillars, or creating a massive, dramatic chimney chase. Real estate reports frequently highlight stone veneer as one of the top home improvements for cost recoupment, often returning over ninety percent of the initial investment.
-
Choose Complementary Textures: Select a stone profile that matches your home’s architectural era. Sleek, stacked stone fits modern or mid-century designs, while rough-hewn rubble or fieldstone pairs beautifully with rustic, farmhouse, or traditional styles.
-
Select the Right Grout Technique: The way the stone is pointed (grouted) drastically changes its look. An overgrout technique provides a classic, old-world cottage feel, while a dry-stack application (no visible grout) offers a clean, contemporary edge.
-
Coordinate with Siding Colors: Ensure the predominant tones in the stone veneer pull from the surrounding siding, trim, and roof colors to create a cohesive, deliberate exterior palette.
Upgrade to Fiber-Cement to Defend Against Extreme Weather
While vinyl has been a popular, budget-friendly choice for decades, it is increasingly viewed as an inferior product when compared to modern innovations in exterior cladding. Vinyl can become brittle in freezing temperatures, melt or warp under intense heat, and is highly susceptible to impact damage from hail or errant landscaping debris. For homeowners seeking the ultimate combination of aesthetic beauty and unyielding structural defense, fiber-cement is the premier choice.
Fiber-cement is a composite material manufactured from a blend of Portland cement, sand, water, and cellulose fibers. This unique composition results in a product that meticulously mimics the look of natural wood clapboard, cedar shingles, or smooth modern panels, but with none of the organic weaknesses. It is impervious to wood-boring insects like termites and carpenter ants, highly resistant to rot, and, crucially, non-combustible, earning it excellent fire ratings. Because fiber-cement is a heavy and specialized material, improper installation can lead to moisture trapping and warranty voidance. It is imperative to carefully vet your siding contractors to ensure they possess specific certifications from the fiber-cement manufacturer, guaranteeing that proper moisture barriers, flashing, and nailing techniques are strictly followed.
-
Opt for Factory-Painted Finishes: Many fiber-cement products come with color baked into the material at the factory, offering a finish that resists fading, chipping, and peeling far longer than traditional on-site painting.
-
Mix Profiles for Visual Interest: Combine traditional horizontal lap boards on the main body of the house with staggered shake profiles in the gables to add texture and historical character to the design.
-
Prioritize Climate-Specific Formulations: Premium manufacturers engineer their fiber-cement boards specifically for different climate zones, ensuring your materials are chemically formulated to withstand your specific regional challenges, whether that is freezing northern winters or humid, blistering southern summers.
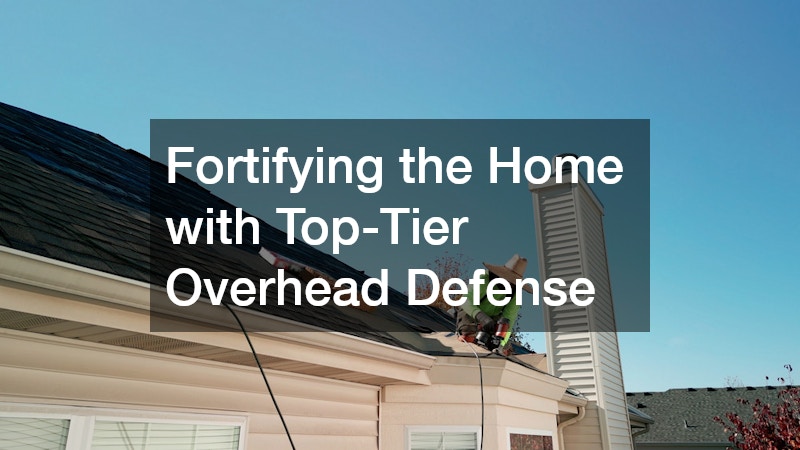
Fortifying the Home with Top-Tier Overhead Defense
Prioritize Reflective Shingles to Slash Cooling Costs
Your roof is the primary shield protecting your home’s structural integrity and interior comfort. A deteriorating, curling, or heavily stained roof is not only an eyesore but a massive red flag for potential home buyers, signaling the potential for hidden water damage, mold, and imminent, costly repairs. When it is time to replace this critical barrier, simply opting for the cheapest traditional three-tab asphalt shingles is a missed opportunity to significantly enhance your home’s energy efficiency.
Modern architectural shingles have evolved dramatically, incorporating advanced technology designed to combat urban heat islands and extreme summer temperatures. By prioritizing shingles embedded with specialized, UV-reflective granules, you can prevent a massive amount of solar radiation from being absorbed into your attic space. These “cool roof” technologies keep the internal temperature of your home stable, slashing the workload on your HVAC system and resulting in substantially lower monthly cooling costs. However, the performance of these advanced materials relies entirely on the expertise behind the labor. A precision roof installation is an absolute necessity; even the most premium, highly rated reflective shingles will fail prematurely, leak, or blow off in high winds if the underlying decking, synthetic underlayment, ice and water shields, and metal drip edges are installed incorrectly.
-
Ensure Proper Attic Ventilation: A new roof system must include balanced intake (soffit) and exhaust (ridge) vents. Without proper airflow, heat and moisture will become trapped in the attic, baking the new shingles from the inside out and voiding their warranty.
-
Demand Synthetic Underlayment: Traditional asphalt-saturated felt paper tears easily and breaks down over time. Synthetic underlayment is tear-resistant, highly water-repellent, and provides a superior secondary barrier against moisture intrusion.
-
Upgraded Flashing is Mandatory: The majority of leaks occur at penetrations and intersections. Insist that all step flashing around chimneys, skylights, and dormers is completely replaced with new, corrosion-resistant metal, rather than reusing old, fatigued materials.
Invest in Ultra-Durable Materials for Long-Term Equity
For homeowners who view their property as a long-term, generational asset, the cycle of replacing an asphalt roof every fifteen to twenty years is both frustrating and financially inefficient. There is a growing, sophisticated trend in residential architecture toward lifelong overhead solutions. Upgrading to ultra-durable materials not only virtually eliminates future replacement costs but also dramatically elevates the high-end appeal and structural resilience of the property.
Among these premium options, certain materials stand out for their exceptional longevity and striking aesthetic. For instance, metal roofing has surged in popularity beyond its agricultural origins, becoming a staple of modern, farmhouse, and contemporary residential designs. The advantages of this material are vast. It possesses exceptional snow-shedding capabilities, preventing dangerous ice buildup and heavy structural loads during winter. It carries a Class A fire rating, offering unparalleled protection against airborne embers from wildfires. Furthermore, styles like standing seam profiles, with their sleek vertical lines and hidden fasteners, instantly modernize older homes while providing a weatherproof seal that can easily last fifty to seventy years with minimal maintenance.
-
Understand the Gauge: The thickness of the material dictates its durability against hail and debris. Opt for a thicker 24-gauge or 26-gauge steel or highly durable aluminum for residential applications to prevent aesthetic denting.
-
Choose Concealed Fasteners: Always prioritize standing seam systems over exposed fastener systems (like corrugated panels). Exposed rubber washers degrade over time under UV light, eventually leading to hundreds of potential leak points, whereas standing seam systems hide the fasteners entirely beneath the interlocking panels.
-
Consider the Finish: Ensure the panels are treated with a premium Polyvinylidene Fluoride (PVDF) coating, which resists chalking, fading, and chemical degradation, keeping the color vibrant for decades.

Managing Water Flow to Protect Your Investment
Install Seamless Systems to Prevent Ice Dams and Overflow
Water is the single most destructive force your home’s exterior faces. While it may lack the glamour of a new entryway or the sweeping visual impact of fresh siding, managing how rainwater and snowmelt interact with your property is the foundation of all home maintenance. Unmanaged water cascading off your eaves leads to a cascade of catastrophic failures: it erodes landscaping, rots wooden fascia boards, causes basement flooding, and exerts immense hydrostatic pressure that can crack your home’s concrete foundation.
To mitigate these risks, upgrading from old, piecemeal, sectional systems to seamless drainage is vital. Sectional systems, typically bought in hardware stores and snapped together, have seams every ten feet. Over time, the sealant in these seams degrades due to temperature fluctuations, creating weak points that inevitably leak. Upgrading your drainage through a professional gutter installation involves bringing specialized extrusion machinery directly to your property. The channels are custom-measured and rolled out in continuous, single pieces of aluminum or copper tailored exactly to the lengths of your rooflines, completely eliminating the seam vulnerabilities and ensuring a smooth, unobstructed path for heavy water flow.
-
Size Matters: Standard five-inch channels are often insufficient for steep roofs or areas with heavy, torrential downpours. Upgrading to six-inch channels and oversized 3×4-inch downspouts exponentially increases water-carrying capacity and prevents overflow.
-
Evaluate Material Options: Heavy-gauge aluminum is the standard for its rust resistance and cost-effectiveness. However, for historic or high-end luxury homes, copper systems offer unparalleled longevity and develop a stunning, rich green patina over time.
-
Maintain Proper Pitch: The system must be expertly pitched—typically a quarter inch for every ten feet of run—to ensure water flows swiftly toward the downspouts without pooling and breeding mosquitoes.
Integrate Leaf Guards and Extensions for Zero-Maintenance Drainage
Even the most robust, high-capacity drainage system is rendered entirely useless if it becomes choked with autumn leaves, pine needles, and roof grit. A clogged channel acts as a dam, forcing water to back up under your roof shingles, destroying the underlying wood decking, and creating massive, destructive ice dams during the winter months.
To achieve a truly zero-maintenance perimeter, you must integrate advanced protection systems that keep debris out while allowing water to flow freely. Additionally, collecting the water is only half the battle; it must be aggressively moved away from the sensitive foundation zone to prevent soil erosion and basement seepage.
-
Invest in Micro-Mesh Technology: Avoid cheap plastic guards or foam inserts that break down or clog easily. Surgical-grade stainless steel micro-mesh guards block everything from large oak leaves to the finest asphalt roof granules, ensuring the channel remains pristine.
-
Utilize Underground Catch Basins: Rather than terminating downspouts with ugly, tripping-hazard splash blocks right next to the house, pipe the downspouts underground. Route the water through solid PVC piping to a pop-up emitter or a dry well located at least ten to fifteen feet away from the foundation.
-
Regular Inspections: Even with advanced guards, it is wise to perform a visual inspection twice a year to ensure downspouts are clear and no branches have damaged the structural integrity of the system.
Designing a Sustainable and Inviting Yard
Plant Native, Drought-Resistant Flora to Reduce Water Bills
A sprawling, manicured, emerald-green lawn has long been the American ideal, but it comes at an exorbitant environmental and financial cost. Traditional turf grasses are incredibly thirsty, require constant chemical fertilization, and demand endless hours of mowing and edging. As utility costs rise and environmental consciousness grows, smart homeowners are shifting toward sustainable landscaping practices that look lush and vibrant but require a fraction of the resources to maintain.
The cornerstone of this sustainable approach is xeriscaping—designing a yard that reduces or eliminates the need for supplemental irrigation. By replacing high-maintenance turf with native perennial beds, ornamental grasses, and drought-resistant shrubs, you create an ecosystem that thrives naturally on the rainfall typical for your region. Native plants have deep root systems adapted to local soils, making them naturally resistant to local pests and diseases. Because understanding local soil pH, microclimates, and hardiness zones is complex, consulting a reputable landscaping company is crucial. They can map out your property’s specific sun and shade patterns, ensuring the right plants are placed in optimal zones for year-round color, texture, and survivability.
-
Implement Smart Irrigation: For the areas that do require watering, abandon inefficient oscillating sprinklers. Install smart drip irrigation lines beneath a thick layer of organic mulch to deliver water directly to the root zones, minimizing evaporation and runoff.
-
Focus on Soil Health: The success of any planting bed lies in the dirt. Deeply amend heavy clay or sandy soils with rich, organic compost to improve water retention, aeration, and nutrient density before putting a single plant in the ground.
-
Layer the Landscape: Create visual depth by planting in tiers. Place tall, structured evergreens in the back for privacy, medium-height flowering shrubs in the middle, and low-growing, creeping groundcovers at the borders to soften hardscape edges.
Illuminate Walkways and Architectural Features for Evening Safety
When the sun goes down, a dark, unlit property loses all of its carefully curated curb appeal and becomes uninviting, or worse, a potential security risk and tripping hazard. Strategic outdoor lighting is the magical element that transforms a beautiful daytime yard into a dramatic, resort-like evening oasis. Proper illumination extends the usability of your outdoor spaces well into the night, highlights your home’s best architectural features, and provides safe, clear navigation for guests arriving after dark.
Effective exterior illumination relies on the concept of “layering” light, rather than relying on a single, harsh, glaring floodlight. This involves blending low-level path lights to define walkways, warm wash lights to illuminate the texture of stone facades, and dramatic uplighting placed at the base of mature trees to accentuate their canopy. Because wiring exterior environments requires precise voltage drop calculations and weatherproof connections to prevent short circuits, it is highly recommended to hire specialized outdoor lighting companies. These experts can design and safely bury low-voltage LED systems that are visually discreet during the day but provide perfectly balanced, warm-toned illumination at night, all operated automatically via astronomical timers or smart home hubs.
-
Master Color Temperature: Stick to warm white LED bulbs, typically in the 2700K to 3000K range. This temperature mimics the warm glow of traditional halogen or incandescent bulbs, avoiding the harsh, sterile blue tint of higher Kelvin LEDs.
-
Avoid Airport Runway Lighting: When illuminating a path, stagger the fixtures alternately on the left and right sides of the walkway, rather than lining them up in perfectly straight, parallel rows, which looks rigid and unnatural.
-
Conceal the Light Source: The goal is to see the effect of the light, not the fixture itself. Hide well lights in mulch beds and tuck bullet directional lights behind small shrubs to create a subtle, magical glow.
Renewing the Approach to Your Property
Fill Cracks and Apply Protective Coatings Before Winter
The driveway is often the largest single expanse of hardscaping on your property, yet it is frequently the most neglected. It is subjected to constant abuse: the immense weight of vehicles, the dripping of corrosive motor oils, the baking heat of the summer sun, and the brutal freeze-thaw cycles of winter. Asphalt, in particular, is vulnerable to the elements. Over time, the sun oxidizes the asphalt binders, turning the surface a faded, brittle gray. Water inevitably seeps into the microscopic fissures that form; when winter arrives, that trapped water freezes, expands with tremendous force, and shatters the pavement from within, creating large, destructive potholes.
To arrest this degradation and extend the lifespan of your pavement by decades, a rigorous maintenance schedule is mandatory. Every two to three years, the surface must be professionally treated. This involves mechanically cleaning the surface, routing out deep structural cracks, and filling them with heavy-duty, hot-applied rubberized filler. Once the structural integrity is secured, a professional driveway sealing company should be brought in to apply a commercial-grade topcoat. This heavy, squeegee-applied layer of coal tar or asphalt emulsion acts as a vital sunscreen and waterproof barrier. Beyond the structural protection, a fresh seal coat instantly restores the sprawling surface to a clean, uniform, deep-black finish, radically enhancing the neatness and contrast of your entire front yard.
-
Prep Work is Everything: A sealer will not adhere to dirt, oil, or loose gravel. Ensure the surface is aggressively power-washed and scrubbed with heavy degreasers before any coating is applied.
-
Wait for the Right Weather: Sealcoats require specific ambient temperatures to cure correctly. Never apply sealer when rain is forecasted within forty-eight hours, or if nighttime temperatures dip below fifty degrees Fahrenheit.
-
Respect the Curing Time: After the application, rope off the entrance and do not allow any vehicular traffic on the surface for a minimum of forty-eight to seventy-two hours to prevent tire tracking and premature wear.
Utilize Permeable Materials for Eco-Friendly Drainage
In many municipalities, the sheer amount of impermeable surface area on a residential lot is becoming heavily regulated. Large, continuous slabs of poured concrete or vast expanses of asphalt prevent natural rainwater absorption, forcing massive volumes of polluted runoff into overwhelmed city storm drains and local waterways. For homeowners facing strict zoning laws, or those simply looking for a more environmentally responsible and aesthetically unique approach, tearing out solid slabs in favor of permeable alternatives is a brilliant upgrade.
Permeable pavers, which feature wide joints filled with fine aggregate to allow water to pass through to a subterranean crushed-stone reservoir, are an excellent choice for modern homes. However, for a solution that combines superior eco-friendly drainage with a distinct, rustic charm, traditional aggregates are making a major comeback. Properly engineered gravel driveways solve municipal runoff restrictions instantly, allowing rainwater to percolate naturally back into the local aquifer. Beyond their environmental benefits, they offer a satisfying, audible crunch under tire and a highly textured, organic aesthetic that pairs exceptionally well with French country, modern farmhouse, or wooded cottage architectural styles.
-
Build a Bulletproof Base: A successful aggregate surface is not simply loose rocks dumped on top of dirt. It requires excavation, laying a heavy-duty geotextile weed barrier, and compacting a deep sub-base of heavy, angular rock (like #3 stone) before adding the finer top layers.
-
Choose Angular Over Round Rock: Never use smooth river rock for a driving surface; the smooth stones will act like marbles, causing tires to spin and creating deep ruts. Always use angular, crushed stone that locks tightly together under weight.
-
Install Edging Restraints: To keep the stone contained and prevent it from migrating into your lawn or street, install rigid borders using cobblestones, steel edging, or heavy timber.
Creating the Ultimate Backyard Entertainment Zone
Blend Aquatic Features Seamlessly with Patio Hardscaping
While the front yard is designed for public presentation and curb appeal, the backyard is an intensely personal sanctuary. It is the zone where lifestyle and leisure take absolute precedence. Shifting focus to the rear of the property, adding luxury amenities fundamentally changes the dynamic of how a home is experienced, turning a standard residence into a private, resort-style retreat. A well-designed backyard oasis encourages family gatherings, provides a private escape from daily stress, and acts as a massive selling point for high-net-worth buyers looking for a turnkey lifestyle.
The crown jewel of any luxury backyard is a custom aquatic feature. Gone are the days of the basic, stark-white rectangular swimming hole surrounded by a narrow strip of concrete. Today’s aquatic designs are deeply integrated into the surrounding landscape. Working closely with an expert inground luxury pool builder is crucial to orchestrating this complex ecosystem. They have the engineering expertise to integrate high-end features such as infinity edges that blur the line between water and horizon, shallow Baja tanning ledges perfect for lounging chairs, and dark-bottom plaster finishes that not only absorb the sun’s natural heat to reduce utility costs but also mirror the sky, giving the water a natural, deep-lagoon aesthetic.
-
Incorporate Fire and Water: Create dramatic sensory contrasts by integrating sheer descent waterfalls spilling from raised masonry walls topped with automated, glowing gas fire bowls.
-
Focus on the Decking: The surrounding hardscape is just as important as the water itself. Utilize heat-resistant, slip-resistant materials like tumbled travertine or textured porcelain pavers that stay cool underfoot during blistering summer afternoons.
-
Upgrade to Variable Speed Pumps: To minimize the ongoing operational costs of your aquatic oasis, insist on modern, variable-speed circulation pumps, which use a fraction of the electricity required by traditional single-speed motors.
Build Multi-Functional Outdoor Living Rooms
A magnificent aquatic feature is only one piece of the backyard puzzle. To maximize the utility and enjoyment of your property, the surrounding hardscape must be designed to accommodate multiple activities, effectively creating distinct “rooms” without walls. The goal is to build spaces that bridge the gap between the comfort of your indoor living room and the fresh air of the outdoors, providing areas dedicated to dining, lounging, and cooking.
To extend the usability of the backyard into the cooler autumn and spring months, these spaces require permanent, weather-resistant structures. Building a custom outdoor kitchen eliminates the isolation of the indoor chef during summer barbecues, providing a social hub equipped with built-in stainless gas grills, under-counter refrigeration, and durable granite or concrete prep counters. Constructing a heavy timber or modern aluminum pergola over the dining area provides crucial shade, while integrating permanent heating solutions ensures the space remains inviting long after the sun goes down.
-
Design a Dedicated Fire Zone: Build a permanent, hardscaped gas fire pit surrounded by built-in masonry seating. Gas offers instant, smoke-free ambiance without the hassle of chopping wood or dealing with flying embers.
-
Control the Elements: When building a pergola or covered lanai, consider installing motorized, louvered roofs that can be opened to let sunlight in or closed to provide complete waterproof shelter during sudden summer downpours.
-
Integrate Audio and Visuals: Elevate the entertainment factor by wiring the outdoor living room with weatherproof, anti-glare televisions and hiding high-fidelity, all-weather speakers throughout the planting beds for immersive, surround-sound audio without visible clutter.
Investing in the exterior of your home is not a single, isolated task, but a holistic strategy that demands a balance of structural pragmatism and creative vision. It is a dual-purpose endeavor: fortifying your property against the relentless wear of the elements while simultaneously crafting a visual masterpiece that turns heads and commands premium market value. The path to a truly spectacular home requires a methodical approach, tackling the unglamorous but vital defenses—like thermal envelopes, watertight roofs, and robust drainage—before moving on to the opulent, lifestyle-enhancing aesthetic upgrades.
As you look at your property today, consider it a blank canvas of potential. Whether it is fundamentally changing the face of the home with textured stone and striking colors, safeguarding the foundation with advanced moisture management, or carving out a private sanctuary in the backyard, every deliberate improvement compounds the equity and the daily joy your home provides. The ultimate reward of a masterfully renovated exterior is a property that not only stands as a resilient fortress against time and weather but also serves as a beautiful, welcoming haven for you and your family for decades to come.